
1. Make a rectangle using the Rectangle Tool (Shortcut: M). Refer to the image below.
2. Then, on Illustrator Menu Bar, click Effect > Warp > Flag and key in the setting below.
3. You can see that even though the rectangle shape has changed, it still maintains its original anchor points and path segments.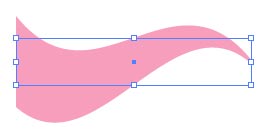
Next, go to Illustrator Menu Bar again and click Object > Expand Appearance. This will create new anchor points along the modified path and it will be easier for you to experiment with the new shape.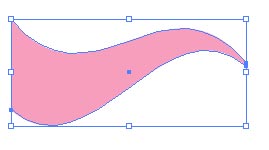
I applied this technique to some of my design such as below.
8)


CONTINUATION FROM Digital Comic Coloring
The usual line art color for comic illustrations is black. Fill in Color is to change line art color to make the artwork more interesting. As you all know that you can fill in color when there is a selection area. And how do you make selection area on line art? You can use Magic Wand but this is not a proper technique plus it does not fully select the whole area that you want. It will missed to select the small and tiny areas. This is when Channel is used.
What is Channel?
I'll show you how to use Channel in this tutorial.
Step 1: Copy... Paste
Select all and copy [Shortcut: Command + C (mac) - Ctrl +C (PC)] line art Daria layer (Refer to 1). Then, click on Channel palette and make a new channel (automatically named alpha 1) and paste [Shortcut: Command (mac)+V- Ctrl +V (PC)] (Refer to 2).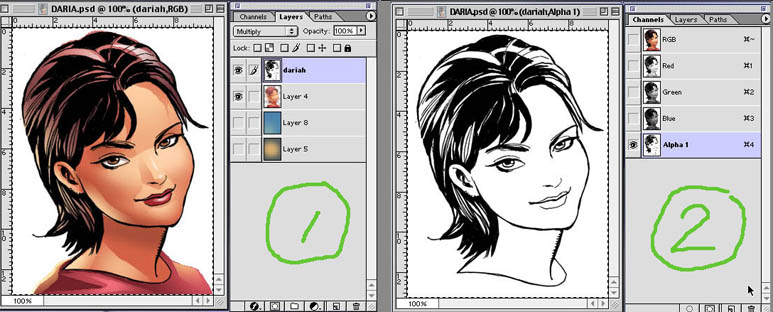
Note: Click on the image to view its original size
Step 2: Load Selection
Invert image on Channel 'alpha 1' [Command +I (mac )] ( PC - change command to control) so it'll become a negative image (Refer to 1). Then, click to Layer palette and make a new layer. On Photoshop menu bar, go to Select > Load Selection (Refer to 2). Click OK on Load Selection pop up window (Refer to 3). Observe: Channel 'alpha 1' is the channel that we paste just now.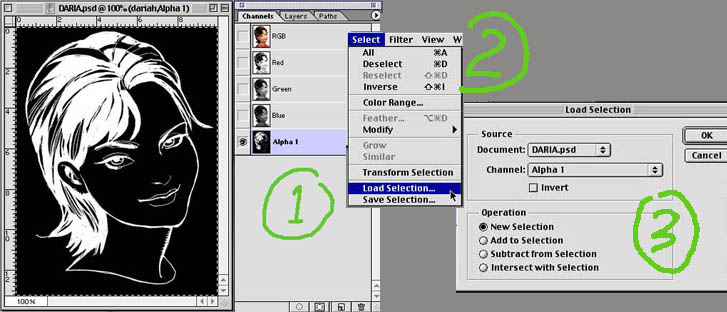
Step 3: Fill Color
Now, you can see the selection area on Daria line art image (Refer to 1). Fill in dark brown color (Refer to 2) or any color that you want. Turn off the original (black outline) line art Daria Layer.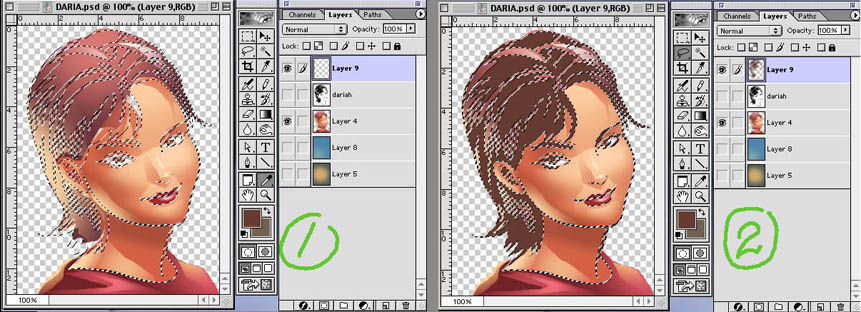
Step 4: Fill In Color Part by Part
Deselect the selection are. On the same layer, make lasso selection at the hair area (Refer to 1). This is a bit tricky.
Click and hold on the thumbnail image on layer palette and at the same time press Command + Control. Then a window will pop out (Refer to 2) and select Intersect Transparency Mask. You can see that the hair area is selected. Fill it with black. I use Airbrush to get the smooth gradient effect.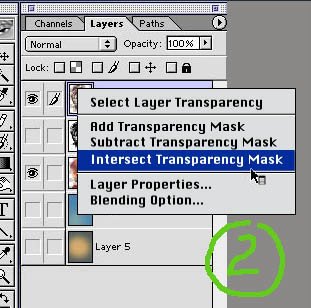
Step 5: Fill In Color Part by Part Again
When you have finished with the hair, repeat the fill in color process on the eyebrows, eye lashes, lips and etc.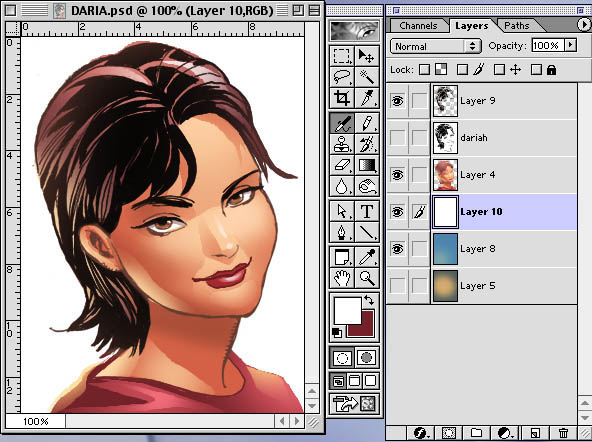
download complete digital comic coloring - pdf format (e-book)
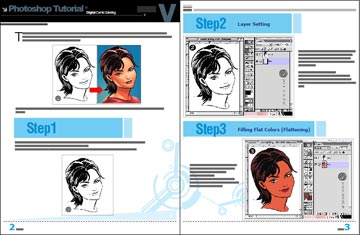
download here
tutorial by: ensalim-huzeyk team
salimdawam@yahoo.com
Hi! We meet again in this huzeyk Photoshop Tutorial. This time we'll be designing a magazine cover where the masthead is behind the main image on the cover of a magazine.
Examples:

STEP 1
Get an image of your favorite artist/singer/etc or you can download the image below. Here, I am using the photo of Malaysia's popular singer, Siti Nurhaliza. Open it using Photoshop.
Note: Click on the image to view its original size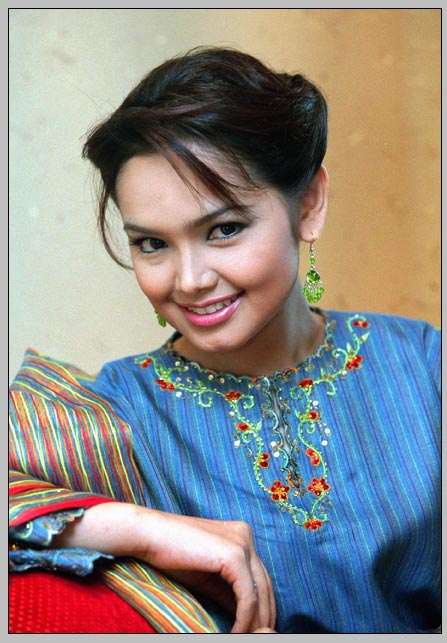
STEP 2
Then, type the name of your magazine. This will be the masthead. I'm naming this magazine as 'Trend'. Click Type Tool (Shortcut: T) and I use the setting below.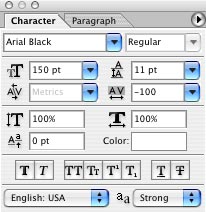
On layer 'Trend', click Layer Window > Layer Style > Blending Mode.
I use this setting for Stroke ....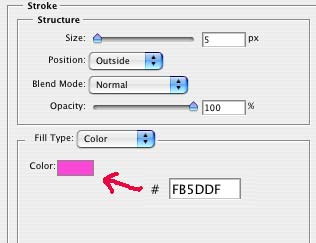
.... and this setting for Drop Shadow ....
.... and this is the result.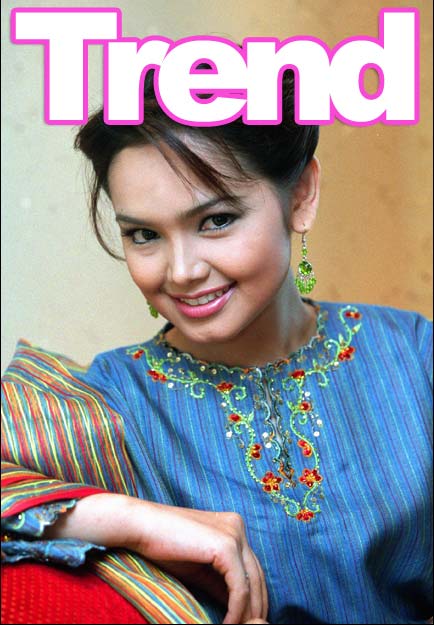
Now, here comes the important part of this tutorial, to move the masthead behind the image so that the image will stand out and to make it looks like the rest of the top magazines in the market.
STEP 3
Change the opacity of layer 'Trend' to 25-30% so it'll be easier for you to make path. Click on Pen Tool (Shortcut: P) and start tracing the path around the head near the masthead.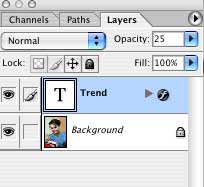

Then, go to Path Window and click on 'load path as selection'.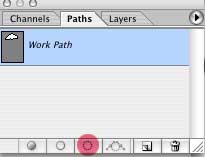
STEP 4
The path will change to normal selection area. Click on the background layer, copy and paste on a new layer. Make sure this layer is on top of the other layers and name it 'head 1'.
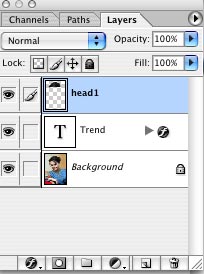
.... and this is the result.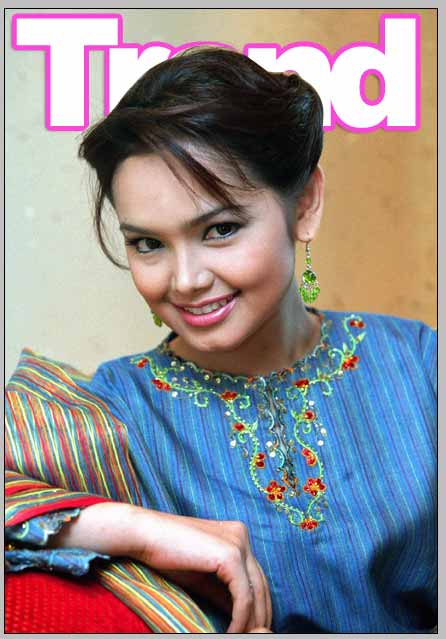
STEP 5
Finally, add on the bar code, published date, volume number, price and titles of the main articles in the magazine to make it look like a real magazine.
download psd file
download here
Tags:

Adobe® Acrobat® 3D - The newest member of the Acrobat software family
Adobe Acrobat 3D software enriches collaboration by enabling extended teams to use Adobe PDF documents to more securely and reliably communicate 3D design intent. Insert and publish 3D designs from major CAD applications in Adobe PDF documents that can easily be shared with suppliers, partners and customers using free Adobe Reader 7.0.
Key benefits:

For more details, visit http://www.asia.adobe.com/products/acrobat3d/main.html
You can easily create crop marks around a graphic in Illustrator. Just draw a rectangle that represents the crop area. With the rectangle selected, go to Object > Crop Area> Make.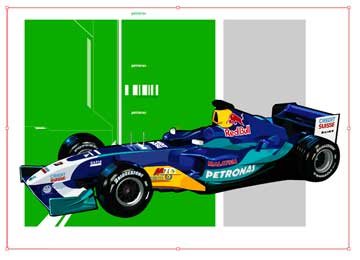
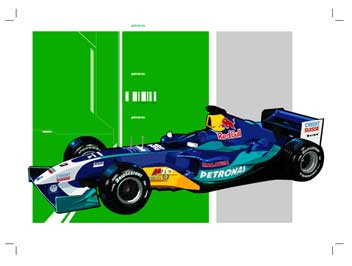
If you need to change the crop marks, use Object > Crop area> Release and then edit the rectangle

If you have multiple Type layers and you want to convert them all to image layers, there's a way to do it without individually rasterizing each. Simply go under the Layer menu, under Rasterize, and choose All Layers. This will rasterize all the Type layers at once
Have you ever tried to create a smooth selection using the Lasso tool? It's just about impossible, right? If you were trying to create a selection for an interface design, or a realistic element of some sort, it would just be too jaggy to use. Here's a tip:
1.Draw around the area you want to use as your selection with the Lasso tool.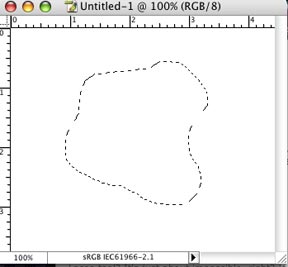
2.Press the letter "q" to enter Quick Mask mode (your selection will now be surrounded by solid pink).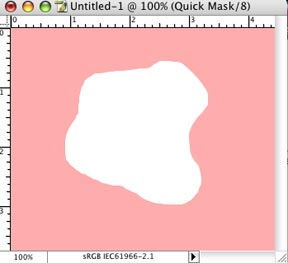
3.Go under the Filter menu, under Noise, and choose Median. As you raise the Radius of the Median filter, you'll see your edges smooth out.
4.When it looks nice and smooth, click OK, then press the letter "q" again to return to Standard mode, and you'll have nothing but a nice smooth selection.


