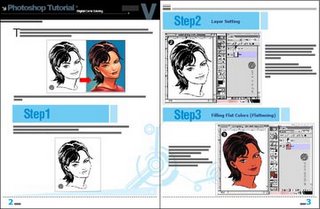
The steps of the tutorials below is for Adobe Photoshop 6. All the shortcuts is according to Macintosh keyboard (quite similar with PC). This tutorial is for those who are familiar with Photoshop. To render a face is a bit tricky, needs a little patient.
Click on images to enlarge
Direction: Download lineart step 1, then click & download actual size file. When coloring in Photoshop, display the files next to the other so it'll be easy for you to refer and pick colors.
1. Download Lineart
p/s - click image to enlarge
Download lineart DARIA without changing the size and dpi.
Open the file using Photoshop (Command+O). Make sure the file is in RGB mode.
2. Layer Setting
Set the layer as shown above. Rename Layer 1 as 'daria' and set it to MULTIPLY. Create a new transparent layer below Layer 1. Name it 'flat' and set it to NORMAL.
Making Lasso Selection
Make lasso selection on Layer 'flat'. Hold the 'Option' key to select different areas of the face, hair, eye pupils & lips.
3. Filling Flat Colors (Flattening)
On Layer 'flat', fill in flat color to the face, hair, eye pupils & lips.
Shortcut for 'Fill Color' is Option+Delete.
Select colors for the face, hair, eyes & lips from the actual image using Eyedropper Tool.
4. Airbrush Tool - Brush Setting
Select Airbrush Tool from the Toolbox and set the Brush Setting to:
Brush pressure - 30%
Brush diameter - 175%
Hardness - 0%
Spacing - 25%
5. Start Airbrushing
The green guide circle that I made shows the brush size. Using Magic Wand, select areas of the face. Pick 'Foreground Color' from the Toolbox. Spray on the forehead with 3 clicks (1), observe the brush position which is a little bit off from the selection. Then, spray in the middle of the face with 3 clicks (2). Done.
Make lasso selection on the forehead. Pick color from the Toolbox. Shade the lower part of the forehead according to the movement shown.
7. Shading the Eyes, Cheeks & Chin
Make lasso selection just like the above. Set the brush diameter to 80% (Shortcut: Press the ' [ ' key for a few times). Pick color from the Toolbox. Shade on the lasso selection area according to the above. Observe the brush position. Set brush diameter to 40% and shade the lower part of the nose with 2 clicks. Observe the brush position.
8. Airbrushing Cheeks & Chin Area
Make lasso selection just like the above. Set the brush diameter to 70%. Pick color from the Toolbox. Spray on the lasso selection area with 2 clicks. Observe the brush position. Set the brush diameter to 50% and spray the chin area with 2 clicks. Observe the brush position. Now, you can see the form of the face.
9. Airbrushing Right & Left Cheek
Make lasso selection on the right & left cheek. Set the brush diameter to 60%. Pick color from the Toolbox. Spray on the lasso selection area with 2 clicks. Observe the brush position.
10. Airbrushing Lips
Make lasso selection just like the above. Set the brush diameter to 30%. Pick color from the Toolbox. Spray on the lasso selection area with 2 clicks. Observe the brush position.
11. Airbrushing Hair
Select hair area using Magic Wand Tool. Set the brush diameter to 60%. Pick color from the Toolbox. Spray on the selection area with 3 clicks. Observe the brush position. Now, the form of the face is much better.
12. Airbrush Highlights
Make lasso selection on the area of the hair, nose & lips (and forehead if you want to). Set the brush diameter to 150% for the hair, 60% for the nose & 30% for lips. Spray on the hair according to the brush position. Observe the brush position.
13. Airbrush Extras
Make lasso selection just like the above. Set brush diameter to 100%. Spray with 2 clicks. Observe the brush position. Now, it's all done.
14. Final Touch up & 2 Light Sources
When everything is OK, you can decide to add on shading or play with o few light sources. Daria is rendered with 2 light sources. Just try a few times so you'll understand then steps.
The Masters
Names such as Brian Haberlin (founder) & Liquid! are the first few people who applied this technique. Other names that are synonym with this comic coloring style are Justin Ponsor, Guy Major, Matt Milla, Richard Isanove and Dave Kemp.
Samples
download complete digital comic coloring - pdf format (e-book)


download here
by ensalim-huzeyk team
salimdawam@yahoo.com
huzeyk portfolio gallery
http://www.huzeyk.com/
8 comments
very nice work, I liked it thank you!
awesome tutorial!
pdf link is dead
Thank you very much, it was most usefull!
Chaise Lounge Commented: "Just a fine blog!"
great tutorial! thank you
Very useful! Thanks alot :D
Greeat read thankyou
Post a Comment