
Photo border... Another creative creation using Photoshop
tutorial by: jedimaster
www.muzamli.com
1. THE FIRST STEP
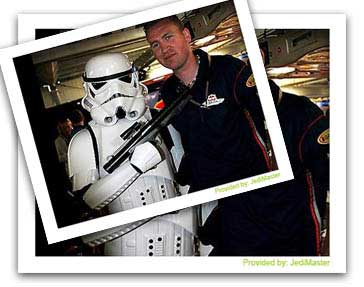
Select an image or photo. I'm using the image above (Photo A) which size is 327 x 260 pixels. Open a new document (Photo B). Size: 364 x 287 pixels with resolution of 72dpi and in RGB color mode.
Then, select Photo A and drag the image to the new document using Move Tools (V)

You can see that I had leave some space around the image for the Photo Border.
2. STROKE EFFECT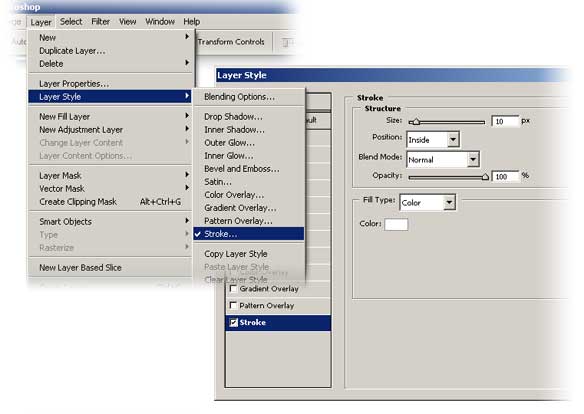
On Photoshop Menu Bar, select Layer > Layer Style > Blending Options > Stroke.
Use the setting below:
Structure:-
-Size : 10 pixels (make it thick)
-Position : Inside (Border will be construct inside the image area)
-Blend Mode : Normal
-Opacity : 100%
Fill Type: Color
-Color : White (or any other color)
3. Drop Shadow Effect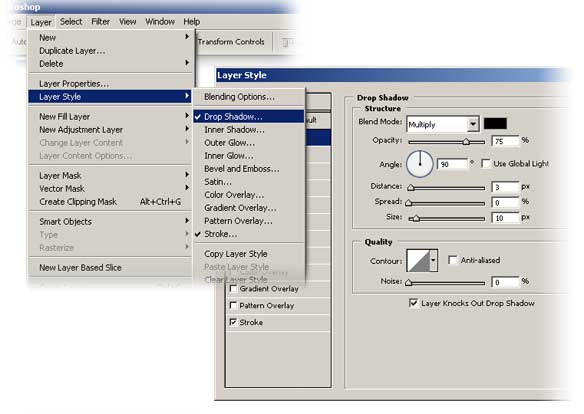
Again, on Photoshop Menu Bar, select Layer > Layer Style > Blending Options > Drop Shadow.
Use the setting below for Drop Shadow:
Structure:-
-Blend Mode : Multiply (Black)
-Opacity : 75%
-Angle : 90 degrees (uncheck Use Global Light first)
-Distance : 3px
-Spread : 0%
-Size : 10px
Quality;- Default setting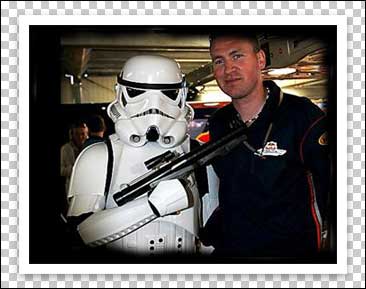
4. Background
If the Shadow effect is not visible enough, try to fill in color to the background. I'm using white as my background color.
(Note: Fill in color on the Background Layer! Not on the image layer). (See the result below)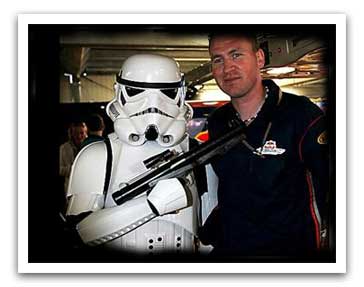
5. Final Touch Up
You can use your own creativity to make it look more interesting. For example, make it looks like a pile of photos as shown above.
Simple isn't it. That's all for now. :-)

0 comments
Post a Comment