This technique shows how to create a pattern tile with edges that won’t be visible when the tile repeats.
1. Open the image that contains the area you want to use for a pattern tile.
image copyright www.atpm.com
2. Crop the image to the size and area you want the pattern tile to be.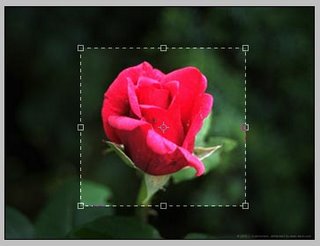
3. Check the size of the file by holding down Option/Alt and selecting the size box in the lower left corner of the window. Make a note of the width and height pixel values.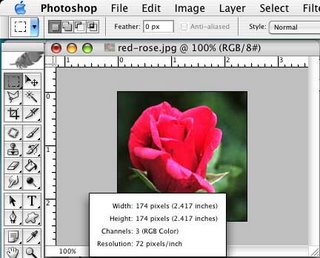
4. Choose Filter > Other > Offset. Select the Wrap Around option; for the horizontal andvertical values, enter approximately half the value of the width and height you noted in step 3.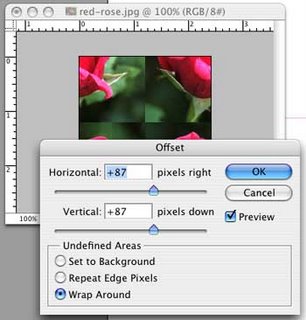
5. Click OK. The Offset filter splits the image into four sections. Notice that the left half of the image completes the right half and the top half of the image completes the bottom half.
6. Now use the Clone stamp tool to blend the center seams between the four sections of the image. I use a soft-edged brush set at 50% opacity. The goal is to try to blend the backgrounds of each rectangle together and to remove other elements that you don’t want to repeat.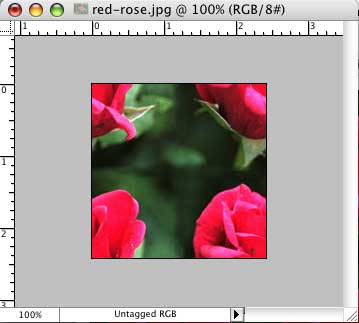
7. To put the finishing touches on the pattern tile, we must reverse the offset process. Choose Filter > Other > Offset. This brings up the filter dialog box last used. Add a minus before each of the pixel values to reverse the offset effect.Click OK.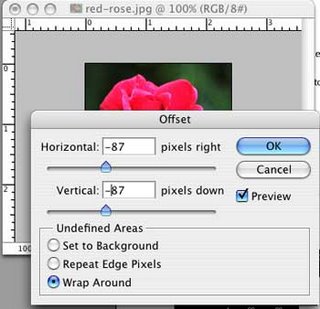
9. Next, test the pattern tile for any flaws. Choose Select > All (Command/Ctrl A); then choose Edit > Define Pattern.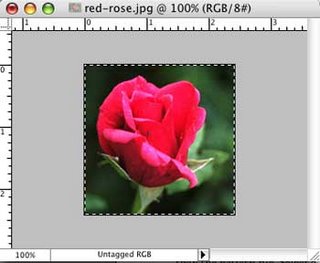
10. Create a new file to use as a pattern fill test. Make sure that the file is several times larger than the pattern tile. Select a large area (or the entire file), and choose Edit > Fill. From the Use pop-up menu, choose Pattern. Use a Mode of Normal and an Opacity of 100% so that you can easily identify any problems in the pattern. Click OK.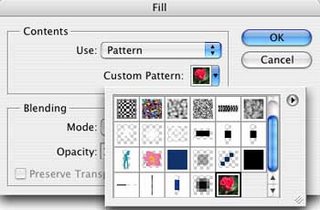

11. Walla..and you're done..you can create piece of art that you like according to your creativity..here's mine
[12:02 PM
|
1 comments
]
1 comments
That is not seamless.
Post a Comment