| 0 comments ]

Nice article on how to promote your online tutorials.. and get traffic to
your website for free.. it works for me...
"So you have written an online tutorial for an application like Adobe Photoshop or maybe an article about a programming language you know like the back of your hand and you did so not only to share your knowledge with others but also to simply improve the traffic of your website and the image of your online business? If so you might now have just one serious problem left, which might be: How to get the word about your new web tutorial out? How to tell others about the great piece of advice you have just written? Fortunately for you there are several simple ways you can take to showcase your tutorial to the public and which will help you to easily reach your goals of more visitors and an improved image - provided your tutorial is really as good and useful as you think.

1. Submitting your tutorial to tutorial database sites
There are many websites on the internet that simply index and showcase good tutorials to a broad audience. To most of those sites you can submit your own tutorial for free and if they accept it they will place a link to it on their site where it can be seen by their visitors. The biggest site of this kind (for Adobe Photoshop tutorials) is probably http://www.good-tutorials.com/ but you might find many others by searching in Google.

2. Submitting your tutorial to tutorial voting sites
Those work quite similar to the tutorial database sites from step 1: You submit your tutorial and if users like it they will vote for it. If a tutorial gets enough votes it gets published to the front page where the most people can see it. An example for such a site would be http://www.tutorialism.com/ but as for everything else on the internet there's quite a variety of different sites available for this purpose.

3. Other social bookmarking services
There are many more websites where you can submit a link and if users like it they can vote for it or tell their friends about it - those might or might not help your tutorial. Anyway, a big list of such sites can be found at Wikipedia in the article "List of social software" and since submitting is very simple it is well worth at least trying it.
After completing all those steps your tutorial should at least receive a few thousand visitors with the top being basically open (but greatly depending on your tutorial's quality). So you can at least be sure you did not write your article for nothing.

About the Author
The author of this article, Thomas Höfter, is an independant website developer who runs a smartphone software directory as well as a Mini SD memory comparison store and a web design tutorial bookmarking site.

| 1 comments ]

Screen tone is used in Japanese comics which is also known as manga.
I will show you an easy way of applying screen tone.

Step 1:
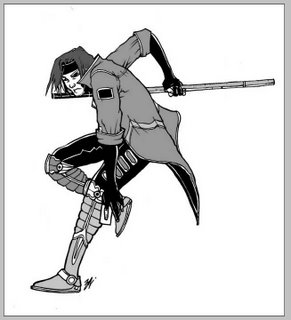
First of all, get a comic illustration in jpeg file format.


artwork by thirtynine - http://www.luzrafikr.com

Step 2:
Make a new layer for you to apply the screen tone effect. Name it screen tone and select multiply mode as shown below.


Step 3:
Using the paint bucket tool, color each and every parts that you'd like to apply the screen tone effect with different grey tones. Before that, make sure you've selected 'All Layers'. Refer to the image below.


OK. Below is the sample of the illustration that has already been toned.


Step 4:
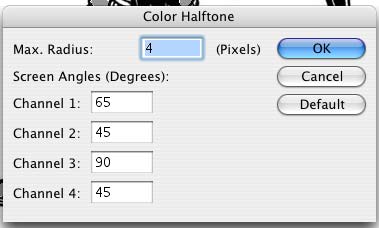
Select all by pressing Command and click at the same time on the screen tone layer to select the grey parts. Copy screen tone layer so that you can overlap the screen tone effect on the grey parts. Set the layer mode to multiply 50%. While the selection is still active, Click Filter>Pixelate and select Color Halftone. Use the setting below.


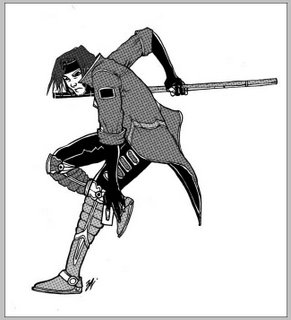
And here is the result of screen tone.

| 0 comments ]

Finding and replacing text is very useful when you need to change a certain word to another without having the trouble of searching the whole document one by one manually.
Imagine if there are more than just one layer in a single document. You can end up having a headache trying to sort it out.
I'll show you how to use this helpful features in Adobe Illustrator. Just follow the steps below.

STEP 1:
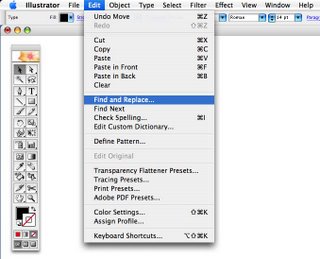
First of all, select Edit > Find and Replace from the Menu Bar.


STEP 2: FINDING THE WORD

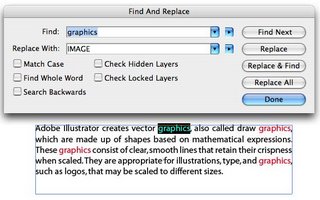
Find And Replace pop out window will appear and now you can type the word/sentence that you'd like to change and the word/sentence that will replace it.
I have highlighted the word that I'd like to change (graphics) in red to make it easy for you to see the changes.
When I click Find, Illustrator will highlight the word for you. Refer to the image below.


STEP 3: REPLACING THE WORD
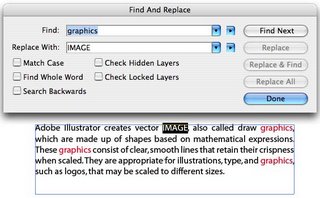
Next, I want to change the word (graphics) with (IMAGE). Click Replace and look at the changes below.


STEP 4: TO CHANGE IT ALL
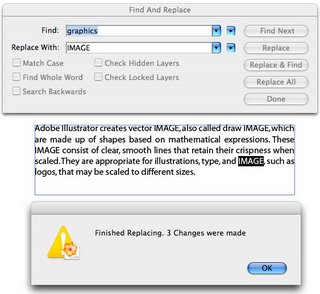
If you'd like to change all the word (graphics) in the whole paragraph to the word (image), just click Replace All and Illustrator will automatically do it for you.
And another pop out window will appear to inform you how many changes were made.


Walla. There you go. It's so easy isn't it. Try and experiment with all the sub features in Find and Replace and enjoy it.

| 2 comments ]

STEP 1: Wrapping Text Around An Object
Place the text in a text area. Then, place the object of your choice in front of the text area (Picture 1). Select the object and on Illustrator Menu Bar, go to Object > Text Wrap > Make (Picture 2). You can see that the text is arranged surrounding the object within the text area (Picture 3).


(Picture 1)


(Picture 2)


(Picture 3)

STEP 2: Wrapping Text Around A Path
Draw a simple path around the object using the Pen Tool. If the object does not have a transparent background, you will have to place it behind the text area (Picture 4). Select the path and on Illustrator Menu Bar, go to Object > Text Wrap > Make (Picture 5).


(Picture 4)


(Picture 5)


STEP 3: To Work With Wrap Objects
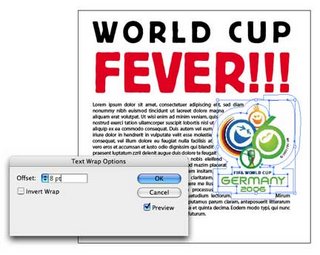
You can experiment with the wrap size by adjusting the Text Wrap Options [Illustrator Menu Bar - Object > Text Wrap > Text Wrap Options]. Can you see the difference between the two settings below?


(Picture 6)


(Picture 7)

| 0 comments ]


To comic fans out there..this is where you can create superhero 3-D type in Adobe® Illustrator® CS.

click here:adobe.com

| 0 comments ]

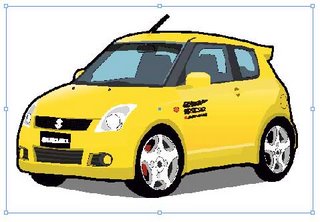
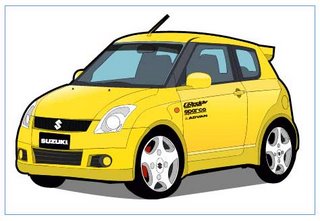
If you're not happy with the low res preview that comes built into an imported .eps file, use Indesign's import options to generate a better one

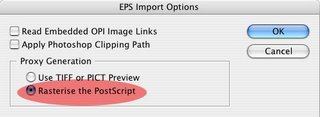
If the the lowres preview image save into your eps file isn't all you'd like or need it to be, check the Show Import Options box in the place dialog box.


In the EPS Import Options dialog box, check the Rasterize the PostScript radio button. This tells InDesign to ignore the canned lowres preview image and generate a new preview image from the PostScript data in the Eps File.


by Tim Cole
Indesign Guru

| 0 comments ]

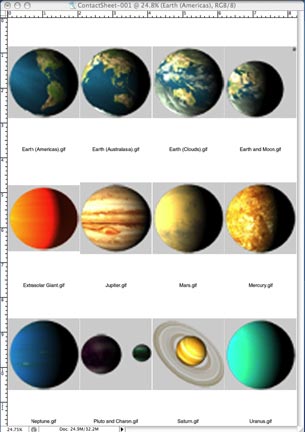
Contact Sheet is something like contact print or thumbnail print. Contact Sheet is usually use to arrange or print out a large amount of images in thumbnail sizes for easy viewing. I will show you the steps of creating Contact Sheet.

click on images to enlarge

Step 1:
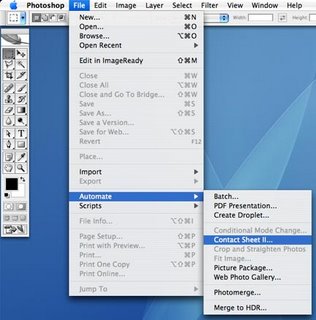
Select File > Automate > Contact Sheet II from the Photoshop Menu Bar.


Step 2:
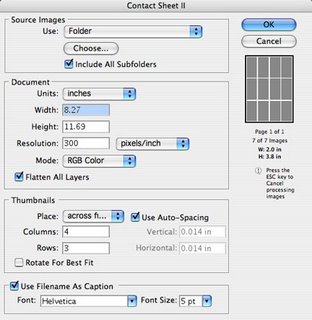
The Contact Sheet II pop out window will appear and you can start customizing your Contact Sheet II properties.


Step 3:


Source Images-
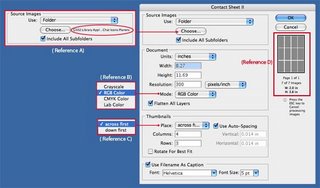
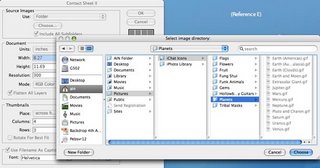
Start choosing the folder that contains the images that you wish to print by clicking the Choose button (Reference A). Another pop out window will appear for you to choose your image directory (Reference E). After selecting the folder, you can see that the the file tracking of the folder that you have chosen will appear next to the Choose button (Reference A).

Document-
This is to set your contact sheet document size, resolution and color mode. There are 4 color mode options (Reference B). I'm setting mine in A4 size, 300 dpi and in RGB mode.

Thumbnails-
This is how you would like to arrange the thumbnails on your contact sheet (Reference C).

Use Filename As Caption-
This is an option wether you want the file name of each images to appear below the thumbnails.

(Reference D) shows you a brief arrangement of the thumbnails, pages of contact sheet, amount of thumbnails/images in a page and the actual size of each thumbnails. Click OK button and Photoshop will automatically do it for you.

Step 4:


Walla! Your contact sheet is all done.

Note: Press the ESC key if you wish Photoshop to stop during the arrangement process.

Blog Widget by LinkWithin