Halftone effect is another creative way to make an image looks more interesting rather than just a normal boring rectangular image. The tutorial below will show you step by step in creating this effect.
Step 1:
Select an image. I'm using the image below which I took during the Malaysian F1 Grand Prix 2006 at the Sepang International Circuit. ( click for larger images )
Step 2:
Adjust the canvas size (Image > Canvas Size) by adding some extra space around the image for you to apply the effect.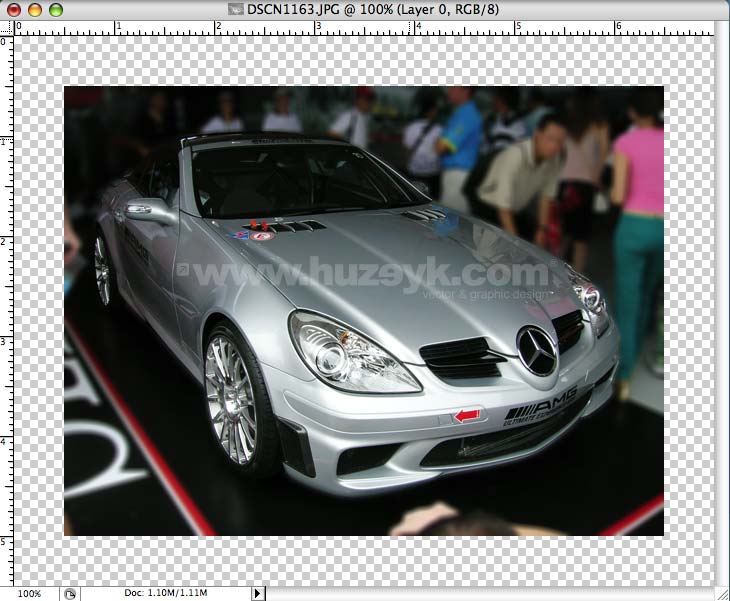
Step 3:
Select an area of the image that you would like to focus on by using the Rectangular Marquee or the Ellipticle Marquee Tool. Experiment with the Feather size (Select > Feather). Bigger pixel size means bigger halftone effect area. I'm using 0 px.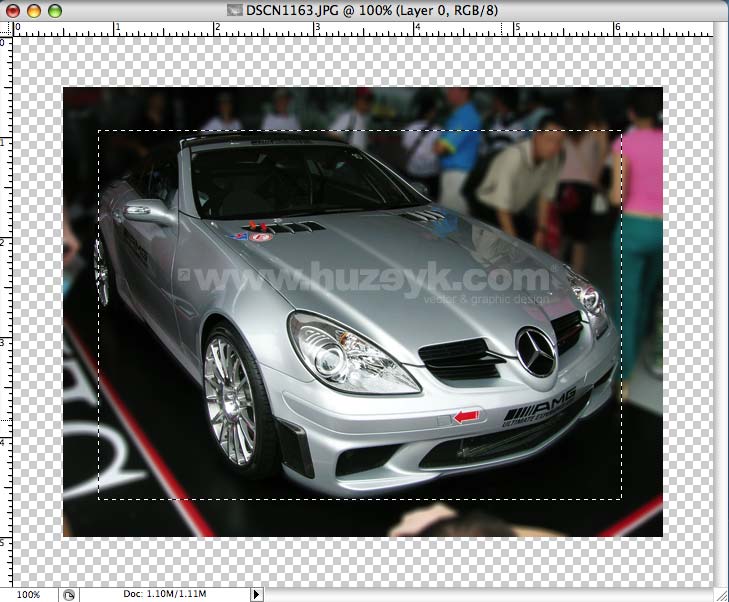
Step 4:
Inverse the selection area (Select > Inverse) or (Shortcut: Command + Shift + I).
Step 5:
Press the 'Q' key (shortcut for Quick Mask) and a red transparent box will appear.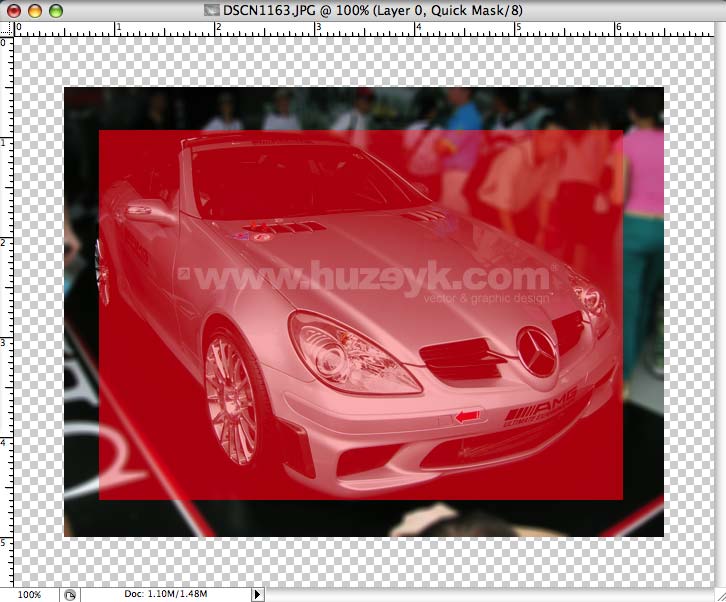
Step 6:
On the Photoshop Menu Bar, go to Filter > Pixelate > Color Halftone.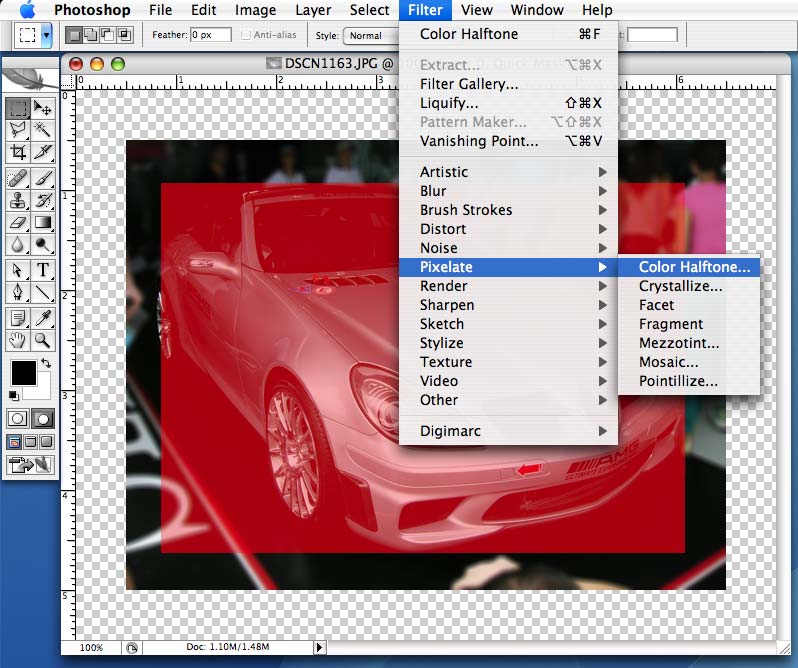
Step 7:
Color Halftone pop-up window will appear and I'm using the setting below. The bigger the Maximum Radius pixel size means the bigger the halftone circles will be. Then click OK.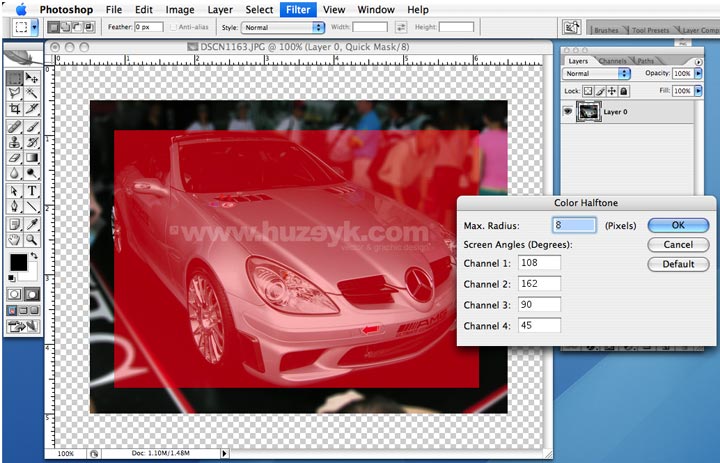
Step 8:
The red transparent box will show you the halftone effect area of the end result. If you are satisfied with it, proceed to the next step.
Step 9:
Press the 'Q' key again to release Quick Mask. A selection area will appear. Press Delete.
Step 10:
There you go. The end result of Halftone Effect.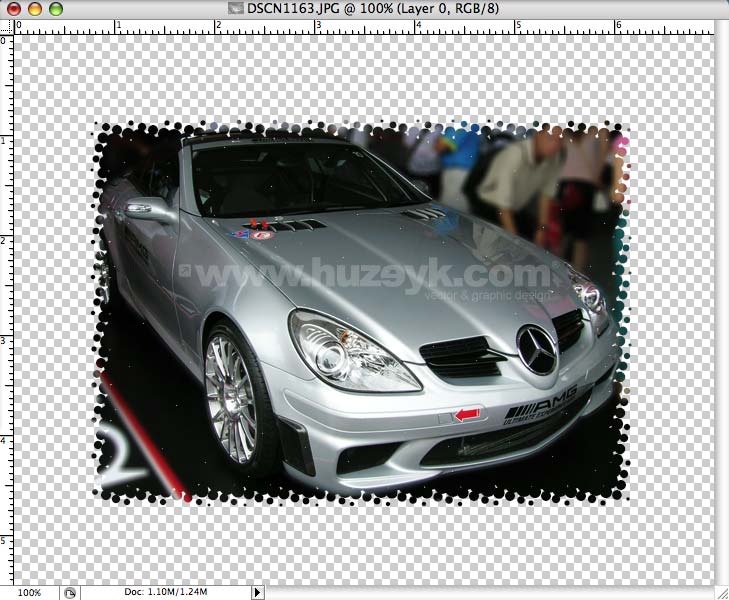

Related Tutorials
1. Creating photo border
2. Creative-photo-cropping
3.Free glossy button

This technique shows how to create a pattern tile with edges that won’t be visible when the tile repeats.
1. Open the image that contains the area you want to use for a pattern tile.
image copyright www.atpm.com
2. Crop the image to the size and area you want the pattern tile to be.
3. Check the size of the file by holding down Option/Alt and selecting the size box in the lower left corner of the window. Make a note of the width and height pixel values.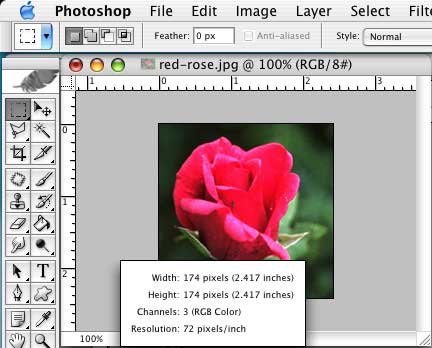
4. Choose Filter > Other > Offset. Select the Wrap Around option; for the horizontal andvertical values, enter approximately half the value of the width and height you noted in step 3.
5. Click OK. The Offset filter splits the image into four sections. Notice that the left half of the image completes the right half and the top half of the image completes the bottom half.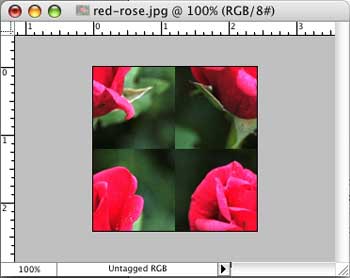
6. Now use the Clone stamp tool to blend the center seams between the four sections of the image. I use a soft-edged brush set at 50% opacity. The goal is to try to blend the backgrounds of each rectangle together and to remove other elements that you don’t want to repeat.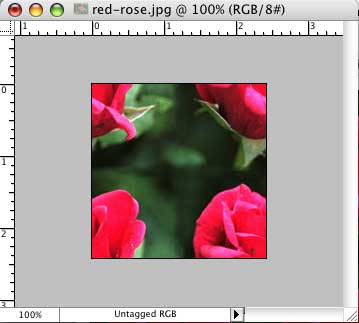
7. To put the finishing touches on the pattern tile, we must reverse the offset process. Choose Filter > Other > Offset. This brings up the filter dialog box last used. Add a minus before each of the pixel values to reverse the offset effect.Click OK.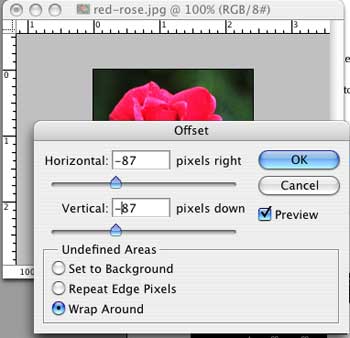
9. Next, test the pattern tile for any flaws. Choose Select > All (Command/Ctrl A); then choose Edit > Define Pattern.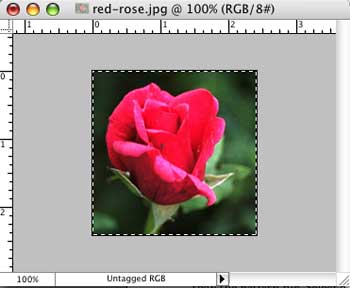
10. Create a new file to use as a pattern fill test. Make sure that the file is several times larger than the pattern tile. Select a large area (or the entire file), and choose Edit > Fill. From the Use pop-up menu, choose Pattern. Use a Mode of Normal and an Opacity of 100% so that you can easily identify any problems in the pattern. Click OK.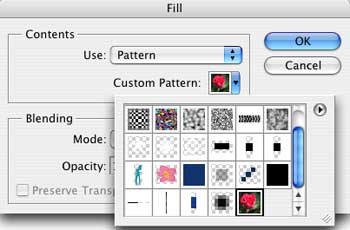
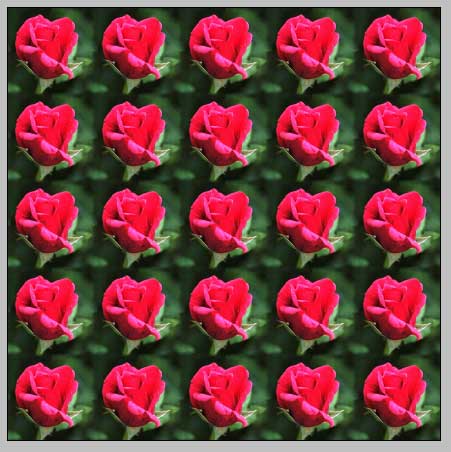
11. Walla..and you're done..you can create piece of art that you like according to your creativity..here's mine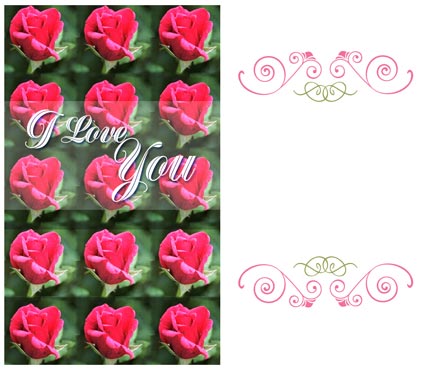
The Live Trace feature has received a lot of attention because it makes creating vector graphics out of bitmap objects a fast and easy process.Live Trace may very well end up being your favorite new feature. It's certainly the one that has garnered the most attention and praise from the technology press. Import a bitmap graphic including photos into your Illustrator document, and then use Live Trace to convert it to a vector graphic. After the conversion has taken place, you can edit the object as if you created it yourself in Illustrator. Live Trace also works on scanned graphics. That means those great ideas you have that end up drawn on cocktail napkins no longer need to be tracedor even worse, redrawnon the computer.
- Just scan the drawing,
- import it into Illustrator,
- and convert it with Live Trace.
In three steps you're done!
The Filter Gallery is a separate interface used to quickly apply filters in Preview window.
If you don't like the way a particular filter is working, click a category and try on another filter.
Many filters use the Filter Gallery as their interface, so you are going to encounter it frequently. If you wish to turn off the gallery to free screen space for the preview, click the small double arrow button. The thumbnails of the filter gallery hide until you click the arrow again.
The Filter Gallery contains the preview on the left, categories of filters in the middle pane, and the filter controls on the right side.
In a single image or layer, you can use the Filter Gallery cumulatively: One filter can be used on top of another filter, on top of another, and so on. You can also apply the same filter several times. Under the filter controls appears a list of filters that are applied. Beneath that, at the very bottom-right corner, are buttons to create new effect layers or delete effect layers. You click the New Effect Layer button, and the list above populates with a new filter. When you click that list item, you can then find a filter from the gallery drop-down list of filters. Each filter builds on the one underneath it. For a different effect, you can change the stacking order of the filters by clicking and dragging the filter up or down through the list. You click the trash icon to delete an effect layer you have selected. When you click OK, your single or multiple filters are applied to the image.

You can show a non printing grid by using View-->Show grid
Once the grid is showing, just go to the preferebces dialog by pressing Command - K ( PC - Control-K) and change the Constrain Angle field from 0 degrees to whatever angle you want.
click to enlarge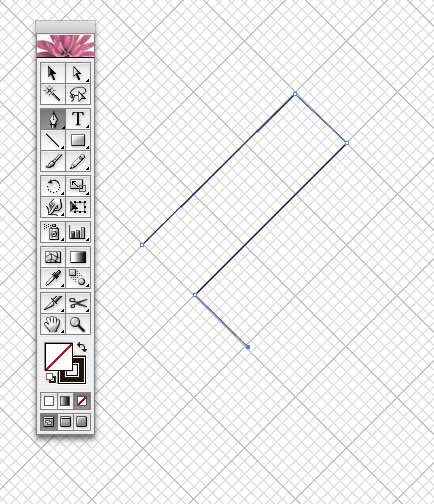
Hold down the Shift key to force tools to precisely follow the angled grid. Once you done, put it back to zero..that's it :-)

Nice article on how to promote your online tutorials.. and get traffic to"So you have written an online tutorial for an application like Adobe Photoshop or maybe an article about a programming language you know like the back of your hand and you did so not only to share your knowledge with others but also to simply improve the traffic of your website and the image of your online business? If so you might now have just one serious problem left, which might be: How to get the word about your new web tutorial out? How to tell others about the great piece of advice you have just written? Fortunately for you there are several simple ways you can take to showcase your tutorial to the public and which will help you to easily reach your goals of more visitors and an improved image - provided your tutorial is really as good and useful as you think.
your website for free.. it works for me...
1. Submitting your tutorial to tutorial database sites
There are many websites on the internet that simply index and showcase good tutorials to a broad audience. To most of those sites you can submit your own tutorial for free and if they accept it they will place a link to it on their site where it can be seen by their visitors. The biggest site of this kind (for Adobe Photoshop tutorials) is probably http://www.good-tutorials.com/ but you might find many others by searching in Google.
2. Submitting your tutorial to tutorial voting sites
Those work quite similar to the tutorial database sites from step 1: You submit your tutorial and if users like it they will vote for it. If a tutorial gets enough votes it gets published to the front page where the most people can see it. An example for such a site would be http://www.tutorialism.com/ but as for everything else on the internet there's quite a variety of different sites available for this purpose.
3. Other social bookmarking services
There are many more websites where you can submit a link and if users like it they can vote for it or tell their friends about it - those might or might not help your tutorial. Anyway, a big list of such sites can be found at Wikipedia in the article "List of social software" and since submitting is very simple it is well worth at least trying it.
After completing all those steps your tutorial should at least receive a few thousand visitors with the top being basically open (but greatly depending on your tutorial's quality). So you can at least be sure you did not write your article for nothing.
About the Author
The author of this article, Thomas Höfter, is an independant website developer who runs a smartphone software directory as well as a Mini SD memory comparison store and a web design tutorial bookmarking site.
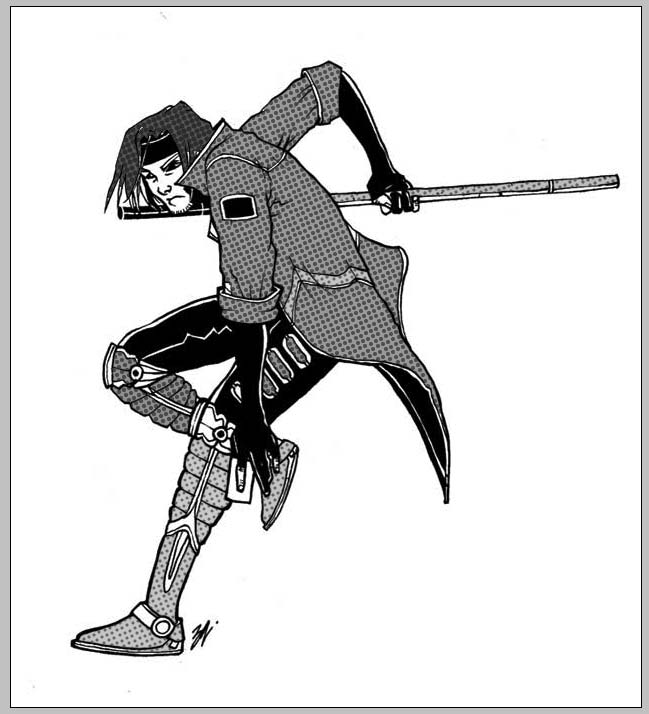
Screen tone is used in Japanese comics which is also known as manga.
I will show you an easy way of applying screen tone.
Step 1:
First of all, get a comic illustration in jpeg file format.
artwork by thirtynine - http://www.luzrafikr.com
Step 2:
Make a new layer for you to apply the screen tone effect. Name it screen tone and select multiply mode as shown below.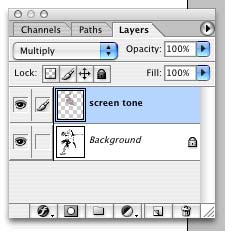
Step 3:
Using the paint bucket tool, color each and every parts that you'd like to apply the screen tone effect with different grey tones. Before that, make sure you've selected 'All Layers'. Refer to the image below.
OK. Below is the sample of the illustration that has already been toned.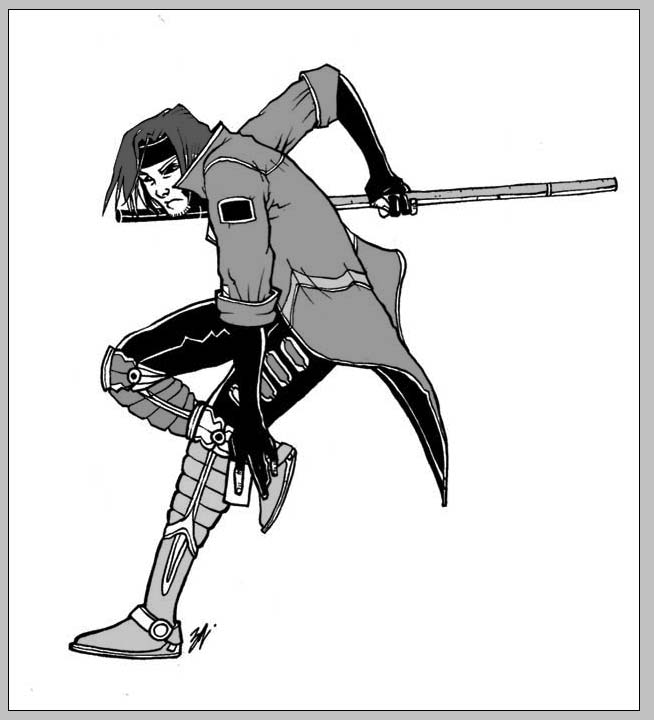
Step 4:
Select all by pressing Command and click at the same time on the screen tone layer to select the grey parts. Copy screen tone layer so that you can overlap the screen tone effect on the grey parts. Set the layer mode to multiply 50%. While the selection is still active, Click Filter>Pixelate and select Color Halftone. Use the setting below.
And here is the result of screen tone.