Step 1
Create a new document (480 pixels x 360 pixels). Make a new layer and name it 'brush'. Select brush tool (Shortcut: b) and start to sketch on the 'brush' layer. Try different brush size. Below is the example. Make sure the background color is black so it'll be easy for you to make selection later.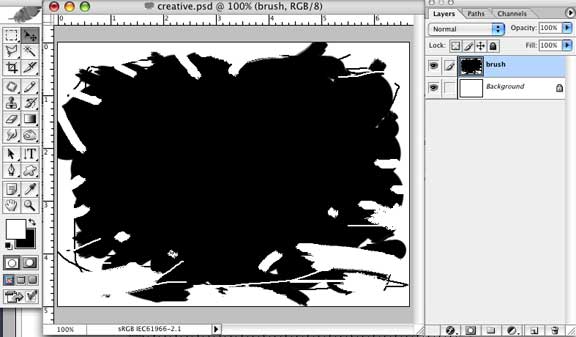
Step 2
Make another new layer and paste your selection of image on this layer. Name this layer 'pic'.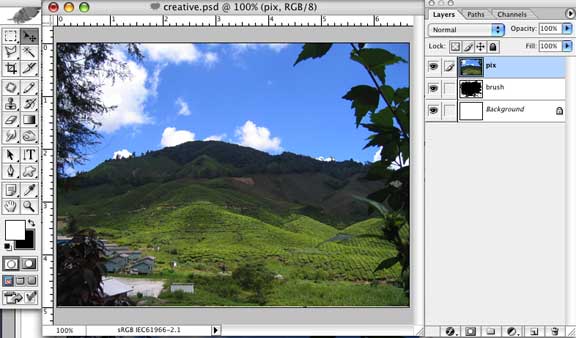
Step 3
Now, hide layer 'pic'. Select layer 'brush' and then go to (Select > Color Range). Select 'sampled color' and select on the black area. The whole black area will be selected automatically.
Step 4
Click layer 'pic' and the you can see the selection area on the image. Make inverse selection (Select > Inverse).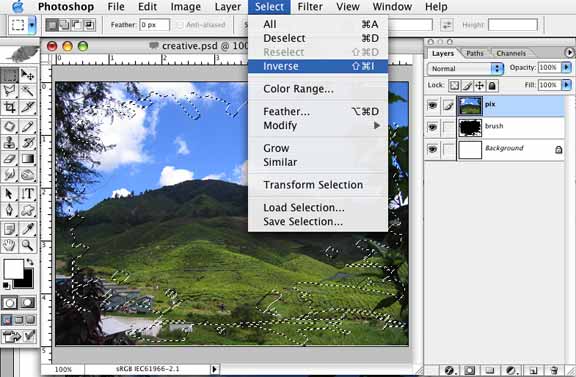
Step 5
Delete the area and the result is as below.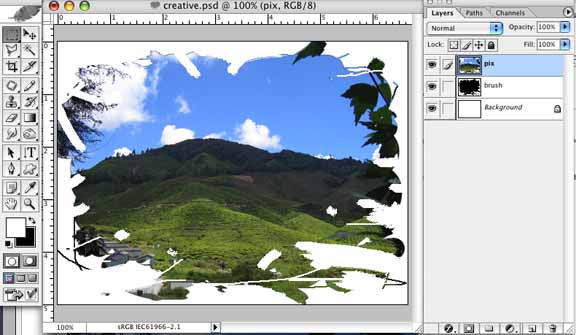
Step 6
Now, lets put some texture effect on layer 'background'. Pick foreground and background color. Using gradient tool (Shortcut: g), drags it upwards or downwards. Make sure the gradient is in Foreground to Background mode.
Step 7
Click Filter > Texture > Texturizer. I use this setting to get the watercolor paper effect.
Step 8
Double click on background layer to create a new layer and go to Layer>layer Style> Blending Options . To get this effect, I use this setting for Inner Shadow. But you can still experiment with the other options.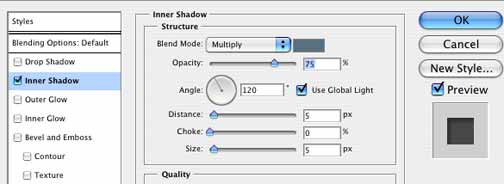
Finally,
There's your own unique photo cropping.yeayyy:-)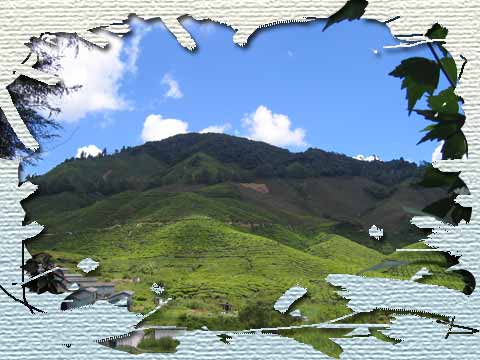

blog of graphic resources and tutorial
0 comments
Post a Comment