
By Dave Nagel
1. Aligning to center
It's easy to align objects or groups of objects tot he center of your page, if you know where to look. Select your objects, and open up the Align palette (Window > Align). In the top right corner of the palette, you'll see a flyaway menu. Select this, and then choose "Align to Artboard" from the list of available options.
Then just click the Horizontal Align Center and Vertical Align Center buttons to center your object(s).
Note that if you select multiple objects, this process will stack all of the objects together in the center of your document window. If you wish to align multiple objects by their absolute centers, rather than as individual objects, group them before performing this action (Object > Group).
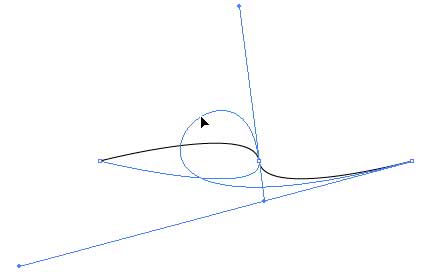
2. Manipulating curves without handles
It's possible in Illustrator to manipulate the curve of path segments without actually switching tools and without fiddling with anchor point handles. FOr this example, we'll start with a straight line that we draw with the Bezier Pen tool. After you've drawn the two end points, you can either add another point in the middle of the line by mousing over it, or move on to the next step. (This will depend on what sort of curve you want to create.)
Now hold down the Option key (Mac) or Alt key (Windows), which temporarily enables the Convert Anchor Point tool. Mouse it over one of your anchor points, and then click and drag to add handles to the anchor point.
Finally, hold down the Command key (Mac) or Control key (Windows) to enable the Direct Selection tool temporarily. Click on a line segment and drag to manipulate your curve without touching tangent handles.
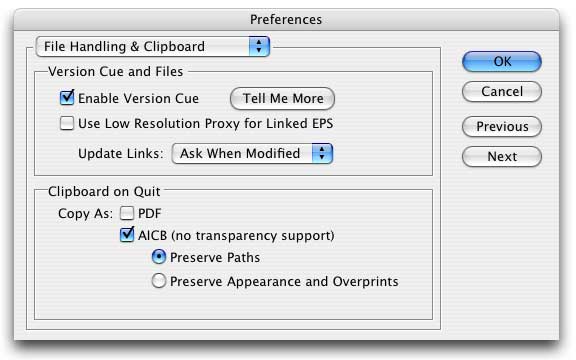
3. Compatible copying
If you use Illustrator as just one part of a broader workflow, there are times when you'll need to copy and paste between Illustrator and other programs. It certainly takes less time than saving your Illustrator document and then importing it into whatever other program you use. But with more recent versions of Illustrator, you might encounter some compatibility problems when copying and pasting. You can overcome this by opening up Illustrator's Preferences and selecting the File Handling and Clipboard preference pane. Here, you should check Copy As AICB, with the Preserve Paths option also checked (assuming you want paths preserved, as when you're using an object from Illustrator as a mask in another program).
4. Setting the default document
If you're tired of having to adjust your document view or document settings every time you create a new Illustrator document, there's a simple workaround: Modify Illustrator's default documents. Illustrator uses two documents as the basis for all new files you create--one for RGB and one for CMYK. CHanging them is simple. Just locate the documents (/ Adobe Illustrator /Plug-ins/ Adobe Illustrator Startup_CMYK.ai and / Adobe Illustrator /Plug-ins/ Adobe Illustrator Startup_RGB.ai). Open the one you want to modify. Any changes you make will be reflected the next time you launch Illustrator and create a new document--everything from zoom level to filters and styles that you import.

5. Adding to an open path
This is a simple one, but one that some of you might not know. Assume that you've drawn an open path and that you accidentally deselect the path. Is it possible to continue adding points or even finish up the object as a closed path? Yes. This even works with objects created by the Line tool. Simply choose the Bezier Pen tool and move it over the point in your path at which you wish to begin adding new point. When you're directly over the anchor point, the Pen tool will show a slash (/) next to it. (It might look like the minus symbol, but it's not.)

Just click on that anchor point, and then you can begin adding new points to the object using the Pen tool.

That's it for now :-)
0 comments
Post a Comment