
To create the perfect star without having to change the setting, press-and-hold Option-Shift ( PC-Alt - Shift ) while clicking-and-dragging the star. Option/Alt changes the radius to the ideal setting for a perfect star and shift will ensure the sides of the star are straight.
p/s:Star tool is nested under the rectangle tool in the toolbox.
Looking for world cup team wallpaper?
England
download 1024x768
Netherlands
download 1024x768
Germany
download 1024x768
Brazil
download 1024x768
Spain
download 1024x768
more soon!
design by:huzeyk
World cup 2006 logo © 2001 - 2006 FIFA, All Rights Reserved
When you change a layout setting that affects page size, margins, or columns, and the Layout Adjustment feature is enabled, that feature uses a set of logical rules to move and resize page guides and objects.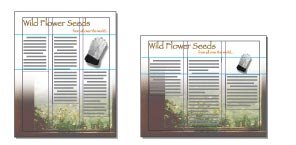
Page designed vertically, for print (left); page orientation changed for on-screen viewing, with layout automatically refitted by the Layout Adjustment feature (right)
You can modify the rules in the Layout Adjustment dialog box. The Layout Adjustment feature attempts to approximate the proportions of the old layout in the new layout by doing the following:
* Repositioning margin guides, but maintaining margin widths, if the page size changes moving column and ruler guides to maintain proportional distances from page edges, margins, or column guides.
* Adding or removing column guides at the right side of the page, if the new layout specifies a different number of columns.
* Moving objects already aligned to any margin, column, or ruler guide, or to any two guides perpendicular to each other, so that the objects stay with those guides if the guides move during layout adjustment.
* Proportionally resizing objects already aligned to two parallel margin, column, or ruler guides or to guides on three sides, so that the objects stay with those guides if the guides move during layout adjustment.
* Moving objects to keep them in the same relative position on the page, if the page size changes.
The Layout Adjustment feature produces more predictable results when a layout is tightly based on a framework of margins, page columns, and ruler guides, and where objects are snapped to guides. Results are less predictable when objects don't adhere to margins, columns, and guides, or when extraneous ruler and column guides clutter a page. Layout adjustment is not affected by the document grid or the baseline grid.
Note: Layout Adjustment affects columns inside a text frame differently than it does page columns. If the frame itself is resized by Layout Adjustment and the Fixed Column Width is not selected in the Object > Text Frame Options dialog box, text frame columns are resized proportionally. If the Fixed Column Width option is selected, columns are added or removed as necessary.
source:
Adobe Indesign CS Help
Adobe Illustrator creates vector graphics, also called draw graphics, which are made up of shapes based on mathematical expressions. These graphics consist of clear, smooth lines that retain their crispness when scaled. They are appropriate for illustrations, type, and graphics, such as logos, that may be scaled to different sizes.
Bitmap images, also called raster images, are based on a grid of pixels and are created by image-editing applications such as Adobe Photoshop. In working with bitmap images, you edit groups of pixels rather than objects or shapes. Because bitmap graphics can represent subtle gradations of shade and color, they are appropriate for continuous-tone images such as photographs or artwork created in painting programs. A disadvantage of bitmap graphics is that they lose definition and appear jagged when scaled up.
Logo drawn as vector art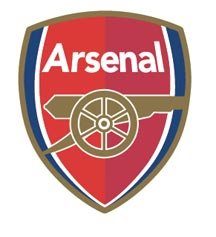
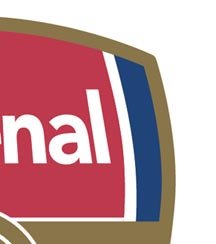
Logo rasterized as bitmap art
In deciding whether to use Illustrator or a bitmap image program such as Photoshop for creating and combining graphics, consider both the elements of the image and how the image will be used. In general, use Illustrator if you need to create art or type with clean lines that will look good at any magnification. In most cases, you will also want to use Illustrator for laying out a design, because Illustrator offers more flexibility in working with type and with reselecting, moving, and altering images. You can create raster images in Illustrator but its pixel-editing tools are limited. Use Photoshop for images that need pixel-editing, color correcting, painting, and other special effects
Turn your photos into exciting photo by adding special effects
Tutorial by: petrakhus3d

1. Make sure your subject or background is suitable to get the best result.

2. Make a new layer (Layer 2), make a round selection using Elliptical Marquee Tool.

3. Fill in with white and double click on Layer 2 on Layer Palette to activate Layer Style Window. Select Outer Glow.

4. Key in the setting below:
Elements - Spread = 7 - Size = 18. You can choose the color that you want in outer glow effects setting. As for me, I’m using blue.

5. Click on Filter>Blur>Gaussion blur. Set it to 3.7.

6. Duplicate Layer 2 and name it Layer 3. Hide Layer 2. On Layer 3, repeat the Gaussion Blur effect (Step 5) but reduce the setting (below 3.7).

7. Hide Layer 3 and select Layer 2. Change the opacity to 80%.

8. Finally, unhide Layer 2 and 3 to view the result. For better effects, adjust the opacity on both layers.

For more advance effects, you can add more magic balls by duplicating the layers. Change it to different sizes and opacity. Arrange it according to your creativity. Experiment with Layer Mode Screen with one of the layers for better result.
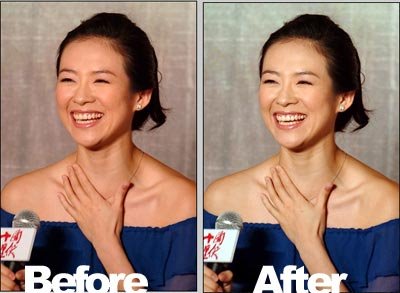
This command is at Image - Adjustments - Auto Level
The Auto Levels command is similar to Auto Contrast in that it maps the brightest
and darkest parts of the image to white and black.
In the process of mapping the tones (adjusting the contrast) in the Red, Green
and Blue channels, dominant color casts can be neutralized. This is not always the
case; it depends entirely on the make-up of the image. In some cases the reverse
is true; when Auto Levels is put to work on a neutral image a strong cast results.
If this occurs, undo (Edit > Undo) the command and apply the Auto Contrast
feature instead.
This tips shows how to place an image inside a text in Adobe InDesign CS..
here we go
Step 1
Type the text. Choose a fat font and a fontsize that is good for filling with an image.
I use arial black and 100 pt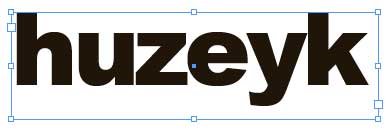
Step 2
In the menu Text /Type choose Create Outlines.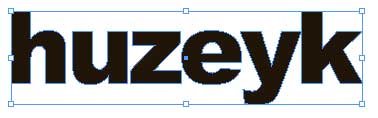
Step 3
Then choose Place. Check that you have checked Replace selected item. Choose your image and it will be placed inside the text outline. Use the direct selection tool (white arrow) to select the image and to move it so you see whatever part of it you want to see and also to scale it the way you want to.
Note: The text is no longer editable.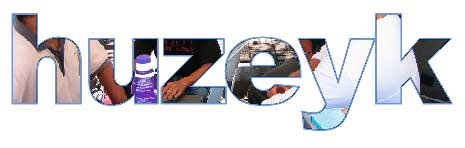
that's it :-)
I thought it would be cool to show you what some of the hottest artists out there are doing with Adobe Illustrator.
Here's my list
1.Philip J. Neal
www.pneal.com
2. Todd Feris
www.warking.com
3. Brooke Nunez
www.lifeinvector.com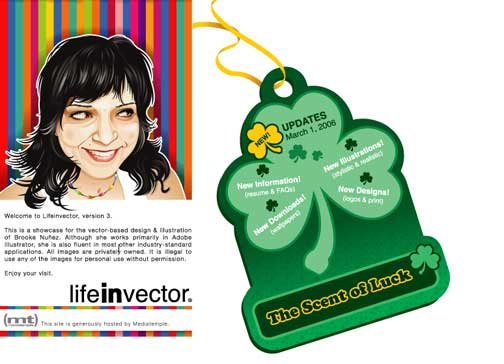
4. Mark Anderson
www.bigwhiskeyart.com
Xlimit is an art appreciation by young graphic artists in Malaysia
through the internet. There are lots of interesting artworks which
include vector art, photography, graphic design, image manipulation
and many more.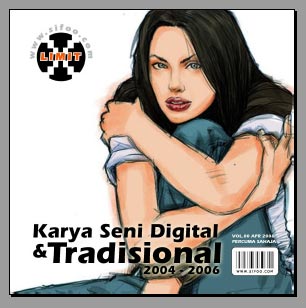
To view --> http://xlimit.sifoo.com
To download --> http://xlimit.sifoo.com/pdf/xlimit_vol00.pdf
right click and save as
The content of this pdf magazine is in Malay. Sorry for the
inconvenience.
Below is my artwork that was chosen to appear on this magazine.
enjoy :-)