
very nice photoshop tutorial . Learn how to make a neat looking blasted effect..simple and it's cool!
link
Changing to Outline view ( Ctrl+Y) is a great way see all the paths and anchor points. If you want to change only one layer to outline view, press and hold Control key and click on its eye icon.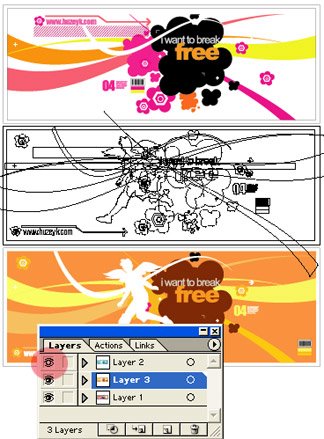
To reset just the horizontal Scale field to its default setting of 100%, without affecting all the other text setting in the Character Palette ( Window>Type>Character), Press Command-Shift-X ( PC: Control-Shift-X)..
You can use this tips to reset the horizontal scaling of an entire selected text block or to simply change the setting in the Character Palette before you create another text object..
JUMP TO ANY LAYER JUST BY CLICKING IN YOUR IMAGE
You can jump to any layer in your document without going to the Layers palette. Press "v" to switch to the Move tool. Now, press-and-hold the Command key (PC: Control key), and click on an object on a layer in your image that you want, and you'll instantly jump to that layer.
To hide an individual layer, click on the Eye icon in the first column next to that layer in the Layers palette. To make the layer visible again, click on the spot where the Eye icon used to be. If you want to keep one layer visible and hide all the others, hold the Option key (PC: Alt key) and click on the Eye icon beside the layer you want to keep visible. To make the other layers visible again, repeat the process.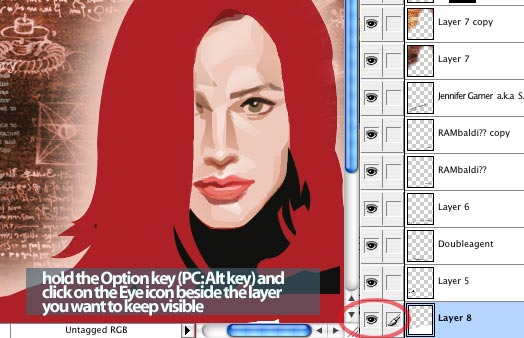
click image to enlarge
What, CRADLE Projekt?
Cradle stands for Corak Rekabentuk Alternatif Dalam Lakaran Ekspresif/Alternative Design Pattern in Expressive Perspective.
The projekt is devoted to all blogger that use blog/web as a medium to express their creativitism and idealism in Art, Illustration, Graphics, Comics Activities.
It's a small step taken by a art assemblage that called themselves Kembara as a medium for all Artist, Illustrator, Graphics Designer, Comicus to expressed their creativity.
Connecting and publishing artblogger creative contents and spread the message would revolt art. The concept of design architectural and creative development in one art assemblage, The ArtBlook Assemblage.
What, ArtBlook! Assemblage?
ArtBlook is inspired by the blogger all over the world that has published their journals in their blog in a book, so it was called a blook. ArtBlook stand for Art Blog Book.
Assemblage is a verb and has the definition of gathering, synonym like aggregation, assembly, association, collection, company, congregation, convergence, crowd, group, throng and in a easier way to tell is it's a collectives.
What is this Projekt For?
A creative human that observe the environment around to create something different and revolting to other. Someone that inspired and aspired to revolt art to the fullest and living and thinking outside the box.
Someone that strive individually and independently to show his creative side of thinking. If it a big show than a communites should gather to make it happen.
Any creative human that do not have a places to exhibit their right brain analogy. Any serious artist that need a route to be known in the world wide web.
Anyone that does Illustration, Drawing, Painting, Comics, Digital Art, Vector Art, Street Art, Graffiti, Graphic, Motion Graphic and any kind of Art And Craft. If you one of those creative human that wanted to share and show how you developed one art project, than it was you that we want. show your roght brain revolting creative art touch.
In a simpler way to make you understand it goes to anyone that has a blog and it's content are about art and craft and has a huge right brain.
Stay up for more newsinfo and update about CRADLE Projektfor more info --->http://cradleprojekt.blogspot.com/
By Leva Duell
You can find templates for every type of image typically used on a web page. From web page templates to header templates, banner templates, navigation buttons, order buttons, and ebook covers, you can find what you need on the Internet. Why would you consider using a pre-made template? Well, below you will find the top five compelling reasons for doing so.Save Time – Sure, you could make your own ... assuming that you have the graphic design skills, the software, and the time needed to put your graphic images together. However, most likely you will find your time better spent on developing and marketing your web site. What is your time worth? Even if you have the know-how and the right software, do you really want to spend your time on this time-consuming task? You would have a better chance of making money if you get your site online faster, and put more time and energy into marketing your site.
Save Money – The other alternative to creating your own web site and web images is to hire a professional designer. This would certainly save you time, but can be expensive – especially when you are creating multiple web sites. For about the same price you would pay to get one designer-made graphic, you could get a whole collection of quality, pre-made templates.
The Results – A high-quality web site with professional-looking graphics will instill confidence in visitors and promote sales. It has been shown repeatedly that using quality graphics can increase sales by 200 to 300 percent, and even more. If you don’t have the skills to design good images, and don’t have the budget to hire a professional designer to custom make them for you, then your best alternative is to invest in well-made templates. All you have to do is add your own text and you are ready to go. The result will be a greatly improved chance for increased sales.
Inspiration – Even if you do have the skills and time to produce your own graphics, coming up with the right image can be difficult. The blank canvass syndrome has plagued artists and graphic designers forever. If you have a collection of well-made templates on hand, then you have an almost unlimited supply of inspiration. You can either customize an existing template, or take one of the template ideas and create your own totally new image.
Availability – Pre-made, quality templates are readily available and generally economically priced. This makes purchasing templates a sound business decision.
Put your time and energy into the most productive tasks. Start using quality web templates to save time, increase productivity, and give a professional look to your web site.
Boost Credibility with Templates!
Header templates/web templates
FREE 34+ clipart and photo resources
Custom design of Web graphics
Article Source: http://EzineArticles.com/?expert=Leva_Duell

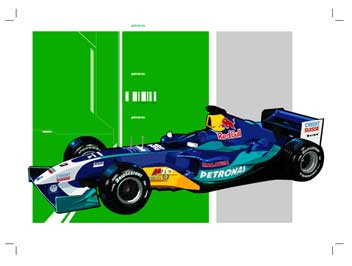
The main difference between Filter and Effect is Effect is more flexible where the object can be modified using Appearance palette (Window > Appearance) but this process uses to much of the computer's memory and processor's power.
In the other hand, Filter will immediately and totally change the object's anchor points and path segments and you won't be able to modify the changes after applying Filter. Applying Filter to an object is much more faster than applying Effect (if the object is complicated with many paths)
Below is an example of the difference.
1. Make a rectangle using the Rectangle Tool (Shortcut: M). Refer to the image below.
2. Then, on Illustrator Menu Bar, click Effect > Warp > Flag and key in the setting below.
3. You can see that even though the rectangle shape has changed, it still maintains its original anchor points and path segments.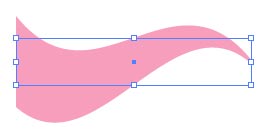
Next, go to Illustrator Menu Bar again and click Object > Expand Appearance. This will create new anchor points along the modified path and it will be easier for you to experiment with the new shape.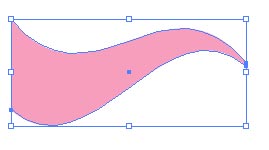
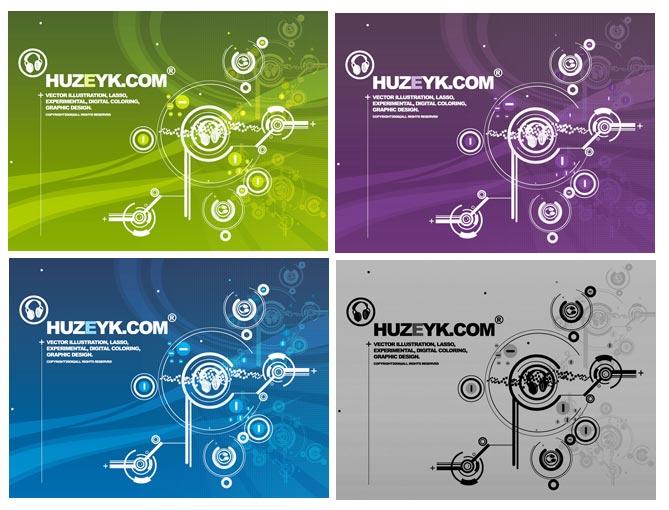
I applied this technique to some of my design such as below.
8)
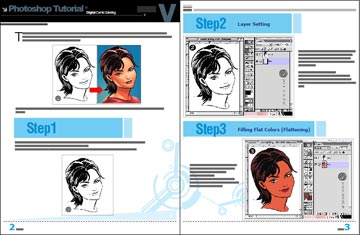
CONTINUATION FROM Digital Comic Coloring
The usual line art color for comic illustrations is black. Fill in Color is to change line art color to make the artwork more interesting. As you all know that you can fill in color when there is a selection area. And how do you make selection area on line art? You can use Magic Wand but this is not a proper technique plus it does not fully select the whole area that you want. It will missed to select the small and tiny areas. This is when Channel is used.
What is Channel?
I'll show you how to use Channel in this tutorial.
Step 1: Copy... Paste
Select all and copy [Shortcut: Command + C (mac) - Ctrl +C (PC)] line art Daria layer (Refer to 1). Then, click on Channel palette and make a new channel (automatically named alpha 1) and paste [Shortcut: Command (mac)+V- Ctrl +V (PC)] (Refer to 2).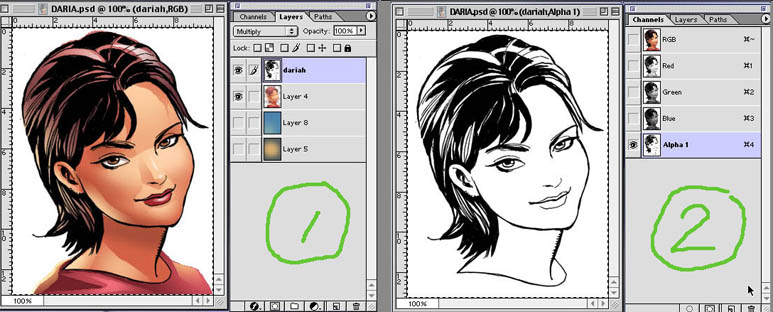
Note: Click on the image to view its original size
Step 2: Load Selection
Invert image on Channel 'alpha 1' [Command +I (mac )] ( PC - change command to control) so it'll become a negative image (Refer to 1). Then, click to Layer palette and make a new layer. On Photoshop menu bar, go to Select > Load Selection (Refer to 2). Click OK on Load Selection pop up window (Refer to 3). Observe: Channel 'alpha 1' is the channel that we paste just now.
Step 3: Fill Color
Now, you can see the selection area on Daria line art image (Refer to 1). Fill in dark brown color (Refer to 2) or any color that you want. Turn off the original (black outline) line art Daria Layer.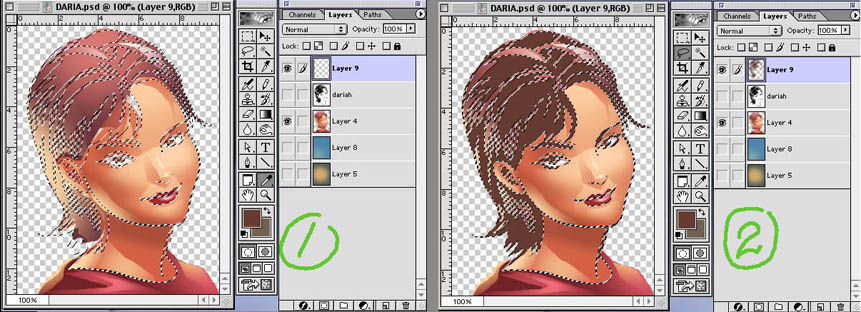
Step 4: Fill In Color Part by Part
Deselect the selection are. On the same layer, make lasso selection at the hair area (Refer to 1). This is a bit tricky.
Click and hold on the thumbnail image on layer palette and at the same time press Command + Control. Then a window will pop out (Refer to 2) and select Intersect Transparency Mask. You can see that the hair area is selected. Fill it with black. I use Airbrush to get the smooth gradient effect.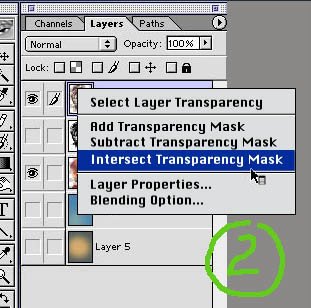
Step 5: Fill In Color Part by Part Again
When you have finished with the hair, repeat the fill in color process on the eyebrows, eye lashes, lips and etc.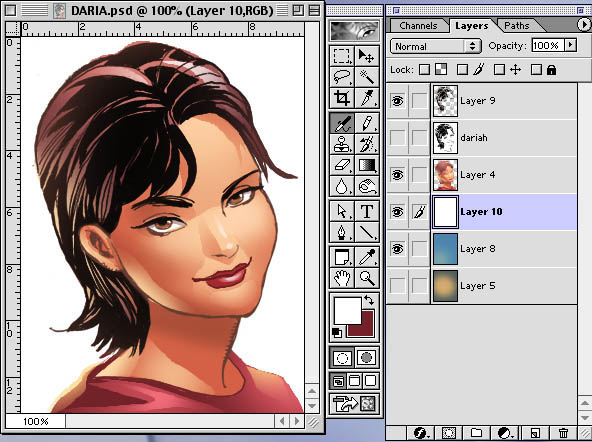
download complete digital comic coloring - pdf format (e-book)
download here
tutorial by: ensalim-huzeyk team
salimdawam@yahoo.com
Hi! We meet again in this huzeyk Photoshop Tutorial. This time we'll be designing a magazine cover where the masthead is behind the main image on the cover of a magazine.
Examples:

STEP 1
Get an image of your favorite artist/singer/etc or you can download the image below. Here, I am using the photo of Malaysia's popular singer, Siti Nurhaliza. Open it using Photoshop.
Note: Click on the image to view its original size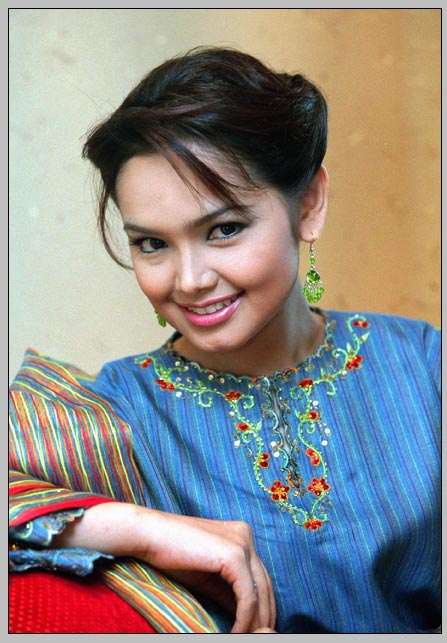
STEP 2
Then, type the name of your magazine. This will be the masthead. I'm naming this magazine as 'Trend'. Click Type Tool (Shortcut: T) and I use the setting below.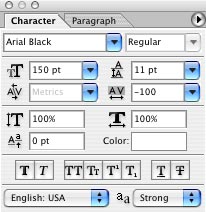
On layer 'Trend', click Layer Window > Layer Style > Blending Mode.
I use this setting for Stroke ....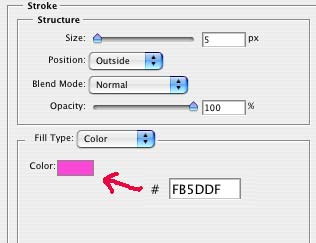
.... and this setting for Drop Shadow ....
.... and this is the result.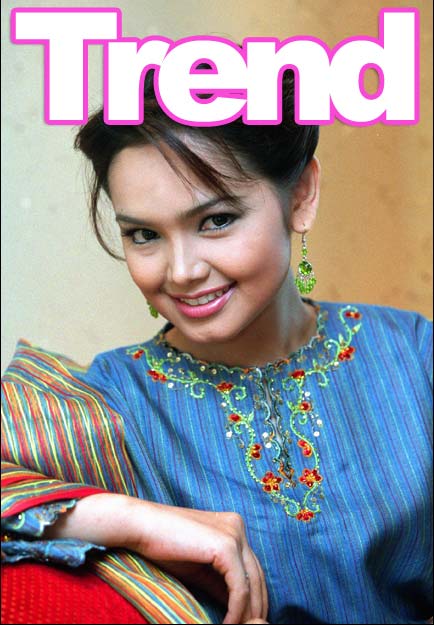
Now, here comes the important part of this tutorial, to move the masthead behind the image so that the image will stand out and to make it looks like the rest of the top magazines in the market.
STEP 3
Change the opacity of layer 'Trend' to 25-30% so it'll be easier for you to make path. Click on Pen Tool (Shortcut: P) and start tracing the path around the head near the masthead.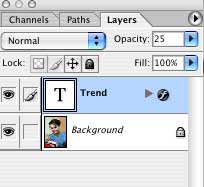

Then, go to Path Window and click on 'load path as selection'.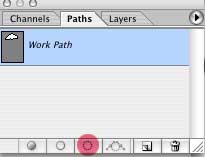
STEP 4
The path will change to normal selection area. Click on the background layer, copy and paste on a new layer. Make sure this layer is on top of the other layers and name it 'head 1'.
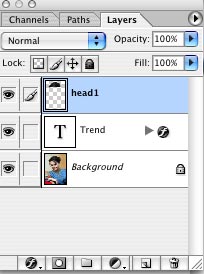
.... and this is the result.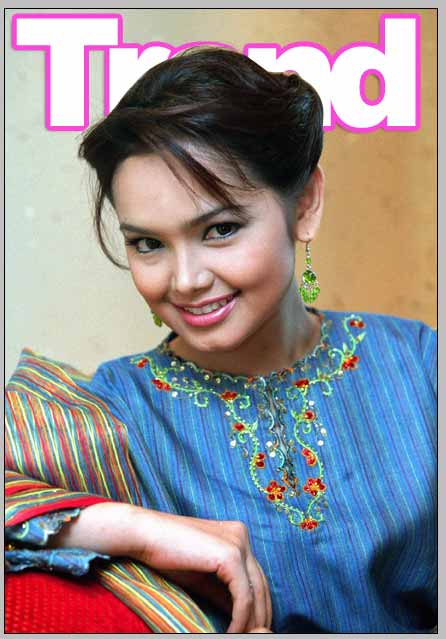
STEP 5
Finally, add on the bar code, published date, volume number, price and titles of the main articles in the magazine to make it look like a real magazine.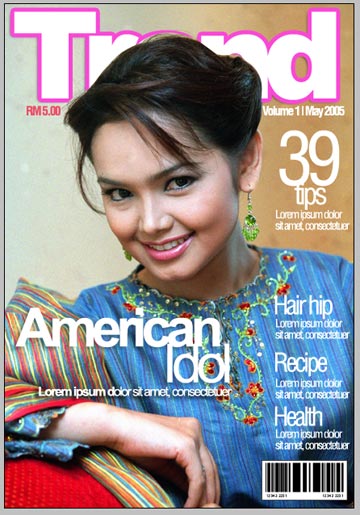
download psd file
download here
Tags:

Adobe® Acrobat® 3D - The newest member of the Acrobat software family
Adobe Acrobat 3D software enriches collaboration by enabling extended teams to use Adobe PDF documents to more securely and reliably communicate 3D design intent. Insert and publish 3D designs from major CAD applications in Adobe PDF documents that can easily be shared with suppliers, partners and customers using free Adobe Reader 7.0.
Key benefits:
![]() Convert 3D designs from major CAD applications
Convert 3D designs from major CAD applications
![]() Capture 3D designs directly from your CAD application
Capture 3D designs directly from your CAD application
![]() Reduce errors, design changes and number of review cycles
Reduce errors, design changes and number of review cycles
![]() Enrich communications
Enrich communications
![]() Accelerate collaboration
Accelerate collaboration
![]() Leverage Microsoft Office documents
Leverage Microsoft Office documents
![]() Control access
Control access
For more details, visit http://www.asia.adobe.com/products/acrobat3d/main.html
You can easily create crop marks around a graphic in Illustrator. Just draw a rectangle that represents the crop area. With the rectangle selected, go to Object > Crop Area> Make.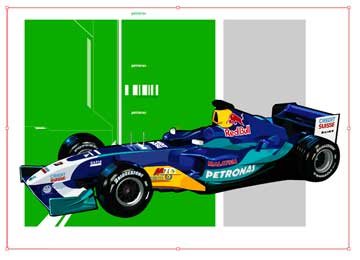
If you need to change the crop marks, use Object > Crop area> Release and then edit the rectangle
If you have multiple Type layers and you want to convert them all to image layers, there's a way to do it without individually rasterizing each. Simply go under the Layer menu, under Rasterize, and choose All Layers. This will rasterize all the Type layers at once
Have you ever tried to create a smooth selection using the Lasso tool? It's just about impossible, right? If you were trying to create a selection for an interface design, or a realistic element of some sort, it would just be too jaggy to use. Here's a tip:
1.Draw around the area you want to use as your selection with the Lasso tool.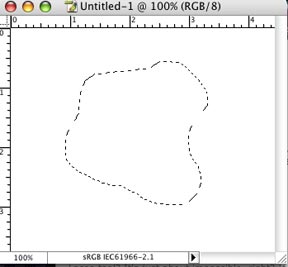
2.Press the letter "q" to enter Quick Mask mode (your selection will now be surrounded by solid pink).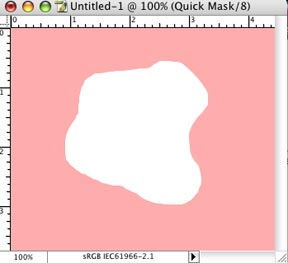
3.Go under the Filter menu, under Noise, and choose Median. As you raise the Radius of the Median filter, you'll see your edges smooth out.
4.When it looks nice and smooth, click OK, then press the letter "q" again to return to Standard mode, and you'll have nothing but a nice smooth selection.